[Beta 探究] 如何解除 Flightsigned Build 的时间炸弹
此文章由原博客迁移而来。
原文地址:https://blog.betaworld.cn/228
原作者:BetaRookie
以下为本文正文部分。
什么是 “Flightsigning”
Flightsigning 描述了使用 flight 证书对文件进行数字签名的过程。Microsoft 用于签署 Windows 系统文件的证书有 4 种常见类型:
- PreProd – PCA 2010
- Prod – PCA 2011
- Flight – Development PCA 2014
- Test – 各种各样的东西,最常见的是 MSIT Test CodeSign CA
Flight 只是 Microsoft 使用的一个特定证书/证书系列,当使用 flight 证书签名时,该版本称为 flightsigned 版本。
为什么 “Flightsigned” 版本无法在当前日期启动
用于对早期 flightsigned 版本进行签名的证书明确指定了过期时间,并设计为在系统时间超过过期时间后立即失效。这意味着一旦这些 flight 证书过期,Windows 将把这些证书数字签名的系统文件视为无效文件。
这有点像你不能用打补丁的系统文件正常启动 Windows。不同之处在于,如果签名因二进制文件的修改而无效,则可以使用 NOINTEGRITYCHECKS BCD 选项强制引导加载程序继续引导,但如果证书过期,引导加载程序将停止加载。
这意味着系统时间不得超过这些 flight 证书的到期时间,因此不能在当前日期启动 flightsigned 版本。
我为什么要写这个指南
在过去的 15 年里,我一直在玩基于 DOS 和基于“经典” NT 的 Windows 的 Beta。一周前,我突然决定玩“现代”版本的 Windows,因为我对它们一无所知。我相信从 Windows 10 测试版开始是一个很好的开始。
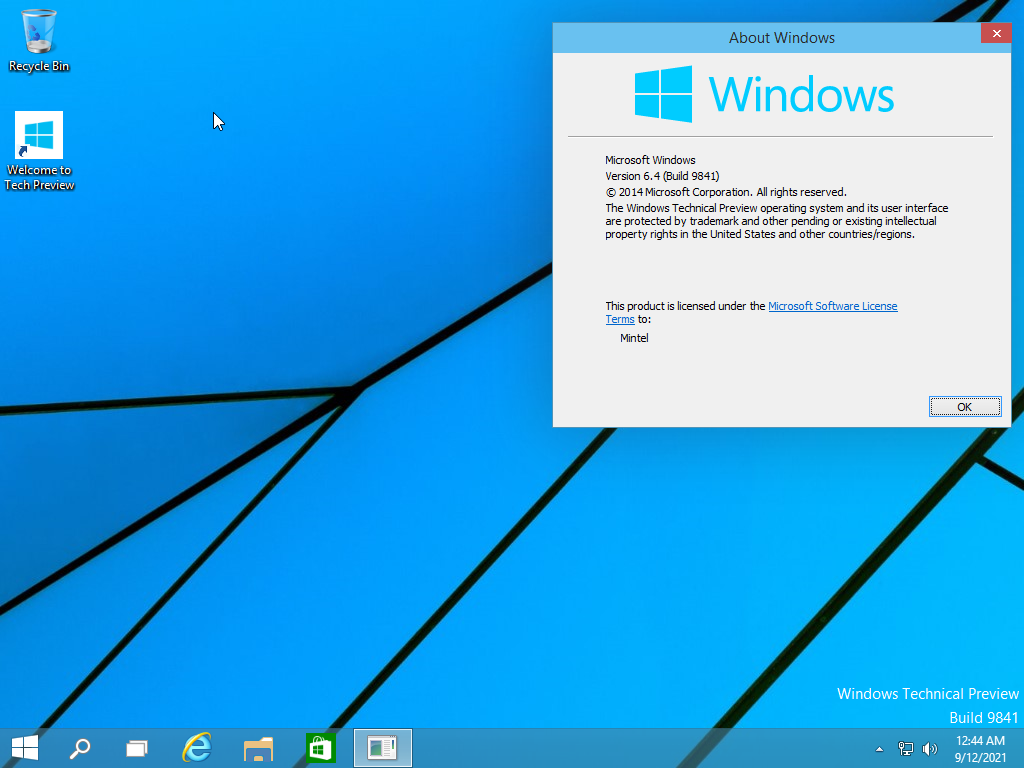
我选择了 Windows 10 的第一个正式预发布版本(build 9841)- 真是个错误!我认为这可能是最容易解除时间炸弹的版本,而我忽略了一个事实,即甚至没有人谈论解除它的时间炸弹。然后我读到只有 fbl_partner_eeap 版本的时间炸弹可以被删除,因为它们包含“非功能的时间炸弹,因此可以在当前日期安装”。好吧,我想挑战一下这个只有 fbl_partner_eeap 版本可以解除时间炸弹的事实,所以我选择继续尝试 9841(fbl_release flightsigned 版本)。
毫无疑问,我高估了自己的能力,意识到解除 flightsigned 版本的时间炸弹就像经历了 9 个地狱圈。嗯,你看既然我在说如何解除它的时间炸弹,很明显,我最终成功了。这是一场漫长而艰难的战斗,我花了将近一周的时间才完全击败 flightsigning。
最初,我修补了内核以启用 NOINTEGRITYCHECKS,然后将所有系统文件的所有数字签名中的所有证书替换为来自 build 9838 的非 flight 证书。是的,它成功了,但目录文件也用 flight 证书进行了数字签名。然后我去把所有的目录都换成了 9838 版本的目录——它不起作用。那么,ci.dll 的补丁似乎是唯一的出路。
因此,最后我修补了 ci.dll,然后 Windows Loader(winload.exe/winload.efi)以加载修补后的 ci.dll,最后 Boot Manager 以加载修补后的 Windows Loader。这听起来很容易,但实际上要难得多… 其实没那么难,只是很乏味。我修补了20个文件,只是为了安全地让 Windows 10 build 9841 的 x86 版本在当前日期启动,而替换 boot.wim、install.wim 和 winre.wim 的所有索引中出现的所有文件花费了更多的时间。由于这个过程非常繁琐,我不打算修补每个 flightsigned 版本的每个架构,所以我只想发布一个指南,希望它能适用于所有架构中的所有 flightsigned 版本。
观众
本指南仅供有经验的读者阅读。要理解这些过程并亲自执行修补,您必须充分了解现代版本 Microsoft Windows 的引导过程。您还应该能够理解 C/C++ 和所需架构的汇编语言。
如果您自己没有能力执行修补,我可以为您修补它们,前提是您在下面的评论部分上传所需的文件(因为我是一个大好人)。目前我只能修补 UEFI Boot Manager 和 Windows Loader,因为旧版 BIOS 的修补非常耗时。您必须上传 ci.dll、winload.efi、winresume.efi、bootmgr.efi 和 bootmgfw.efi。不要忘记,补丁只负责禁用证书到期检查,您仍然需要按照这个指南来解除时间炸弹。
桃花注:很遗憾评论功能无法使用,所以如果各位真的想“拆弹”还是自己动手吧。
如果您希望自己修补这些文件,请继续阅读以下部分。
修补 Windows 以在当前日期启动
由于存在不同的架构,即使对于相同的架构,补丁也可能不同(不同的偏移量、不同的寄存器),因此我将主要使用 C/C++ 伪代码演示补丁。
CI.DLL
要修补的第一个文件是 ci.dll,它是负责签名验证的代码完整性库。我们不会完全删除签名验证,我们只是让它忽略过期的证书。
有一个名为 STATUS_IMAGE_CERT_EXPIRED 的状态,我们不希望 return 该状态。因此,我们需要修补可能 return STATUS_IMAGE_CERT_EXPIRED 的函数。由于不同的版本具有不同数量能够 return STATUS_IMAGE_CERT_EXPIRED 的函数,并且这些函数可能都不同,因此您应该在 ci.dll 中搜索 0x0C0000605。当您发现类似 mov ???, 0C0000605h 的内容时,请检查是什么原因导致 0C0000605h 移动到 ??? 寄存器,您会发现这样的 if 语句:
if ( condition )
{
  // certificate expired
  result = STATUS_IMAGE_CERT_EXPIRED;
}
// certificate not expired
我们需要删除 if 语句,最好是将条件跳转修补为无条件跳转,或者 NOP 掉条件跳转(取决于具体情况)。确保找到所有的 mov ???, 0C0000605h 并对其进行修补。
由于我们修改了系统文件,所以为了安全起见,还应该对 CipReportAndReprieveUMCIFailure 进行修补。在这里,我们需要让 (g_CiDeveloperMode & 1) != 0 的 if 语句中的代码执行,无论 g_CiDeveloperMode 的值如何。
if ( (g_CiDeveloperMode & 1) != 0 )
{
  // code here
  EventDescriptor = (const EVENT_DESCRIPTOR *)CiPolicyFailureIgnored;
  *(BYTE *)a10 = 1;
  // code here
}
您应该在 TEST 指令之后找到一个条件跳转。同样,根据具体情况,你需要要么将条件跳转修补为无条件跳转,或者直接 NOP 掉它。
没有符号的额外步骤
对于 g_CiDeveloperMode 的修补,您需要首先识别 CipReportAndReprieveUMCIFailure 函数。要识别该函数,请搜索 ASCII 字符串 “This break indicates this binary is not signed correctly”,然后跳转到引用。向上滚动,直到找到对 PsGetProcessProtection 的调用,并在上面不远处看到一个 TEST 指令(test something, 10h)。一旦你找到了,你应该看到另一个 TEST 指令(test something, 1)在这条指令之上,而这个 TEST 指令就是 (g_CiDeveloperMode & 1) != 0 的 if 语句。现在,您可以像使用调试符号一样,在它的正下方修补条件跳转。
WINLOAD.EFI/WINLOAD.EXE, WINRESUME.EFI/WINRESUME.EXE
由于我们修补了 ci.dll,因此必须修补 Windows Loader 以加载修补的 ci.dll。有两个东西需要修补 – 签名有效性检查(导致蓝屏显示 Windows 无法加载 xxx 的原因)和引导选项检查(防止自动修复屏幕)。
对于签名有效性检查,我们需要删除对 ImgpValidateImageHash 函数 return 值的检查。您也可以将 ImgpValidateImageHash 本身修补为 return 0,但我建议您修补 return 值检查(将复杂函数修补为仅 return 0 可能会导致不希望的效果)。首先找到 ImgpValidateImageHash 函数,跳转到引用,您应该看到 return 值被移动到另一个寄存器,然后是一个 TEST 指令。您应该修补 TEST 指令下的条件跳转,如果其跳转到 if 语句之外,则修改为无条件跳转,以避免 if 语句内的代码被执行。如果它跳转到 if 语句之内,那么您应该 NOP 掉条件跳转。代码可能是这样子的:
result = ImgpValidateImageHash(something);
if ( result < 0 )
{
  result = ImgpFilterValidationFailure(something);
  if ( result < 0 )
  {
    if ( (something & 0x20) != 0 )
      goto Label;
    result = 0;
  }
}
然后,您应该修补 BlImgQueryCodeIntegrityBootOptions,告诉 Windows Loader 忽略“已损坏”的文件,以避免每次启动 Windows 时出现“准备自动修复”屏幕。您只需要将第二个参数(IntegrityChecksDisabled,一个 PBOOLEAN)设置为 TRUE。
没有符号的额外步骤
要找到 ImgpValidateImageHash 函数,请搜索 ASCII 字符串 “1.3.6.1.4.1.311.61.4.1”,然后跳转到引用。要找到 BlImgQueryCodeIntegrityBootOptions 函数,请搜索 0x16000048 直到在其下方不远处看到 0x16000049,然后继续搜索 0x16000048 直到再次在其下方看到 0x16000049。
BOOTMGR/BOOTMGR.EFI, MEMTEST.EXE/MEMTEST.EFI, CDBOOT.EFI
Boot Manager 也必须进行修补,才能加载修补的 Windows Loader。该修补过程与 Windows Loader 修补过程相同,只是不需要修补 BlImgQueryCodeIntegrityBootOptions。最困难的部分是修改压缩的 bootmgr 文件以用于传统 BIOS 引导。如果您使用的是 UEFI,那么在修补完这些 Boot Manager .EFI 文件后,您就完成了所有操作。
要修补压缩的 bootmgr 文件,首先需要了解其结构。它可以分为 4 个部分 —— 一个原始的 16 位 stub 加载器,一个包含压缩部分信息的自定义结构,一个 stub PE 文件,最后是压缩的 Boot Manager。
第一步是解压缩它或找到一个未压缩的副本。您应该能够在 boot.wim (WinPE)中找到一个名为 bootmgr.exe 的文件,该文件与 bootmgr 中的 Boot Manager 文件相同,只是没有被压缩。然后,您需要按照上面的 Boot Manager 修补方法进行修补。最后,您必须压缩经过修补的可执行文件并将其添加回 bootmgr。对于压缩,您可以使用 joakim 的 BOOTMGR 重新编译程序 v2。它输出一个带有硬编码 16 位 stub 的组合 bootmgr,因此我强烈建议您从输出文件中提取压缩部分,并用它替换原始 bootmgr 文件的压缩部分。当然,您还必须修改 16 位 stub 下面的自定义结构和 PE stub 的 PE 校验和。jaokim 记录了自定义结构,因此请参见 BOOTMGR 重新编译程序 v2 项目页面。PE 校验和更正有点困难,所以我反编译了一些 bootmgr 签名检查函数并将其组合成了一个程序。只需运行它来显示正确的校验和,然后将 PE stub 的 PE 校验和更改为正确的校验和。
解除时间炸弹
令人惊讶的是…也许不是,上面的长篇大论甚至与解除时间炸弹无关。如果您正确地修补了所有文件,您现在应该能够在当前日期启动 Windows,但定时炸弹仍然存在。与 Windows 10 的其他预发布版本一样,flightsigned 版本也可以按照这个 BetaArchive 的指南进行拆解。那个指南有点混乱,所以当我有时间的时候,我会为 BetaWorld 写一个更好的指南。
一些解除时间炸弹的版本和修补后的文件
9841 x86 (UEFI & BIOS)

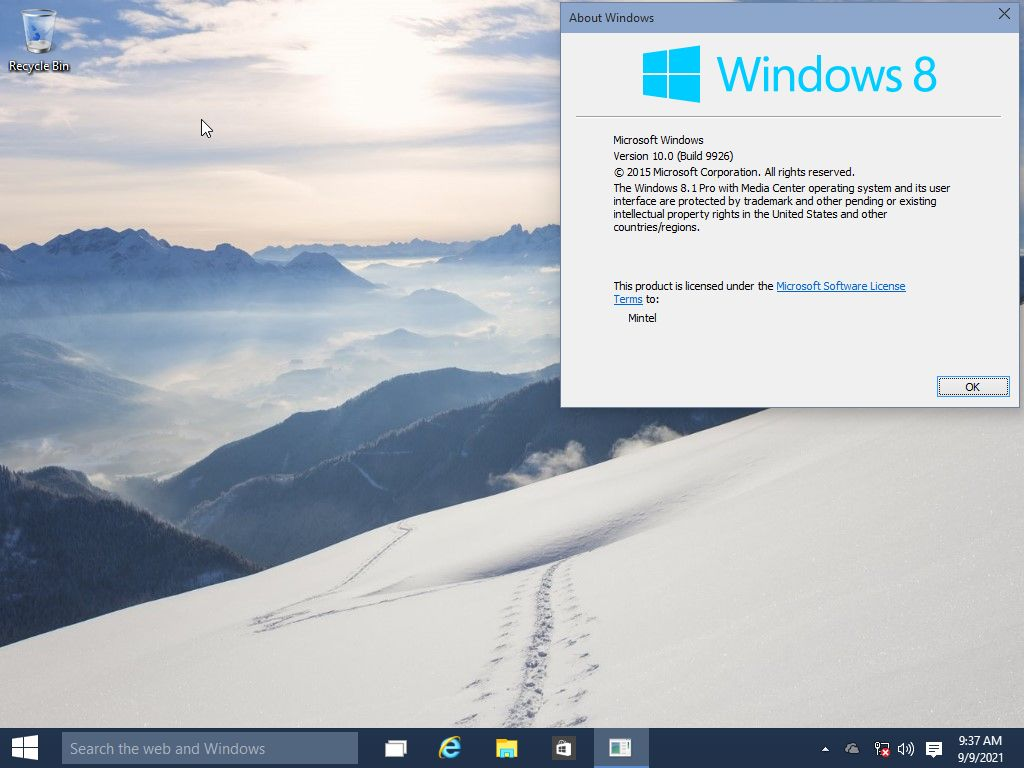
9926 x64 (UEFI)

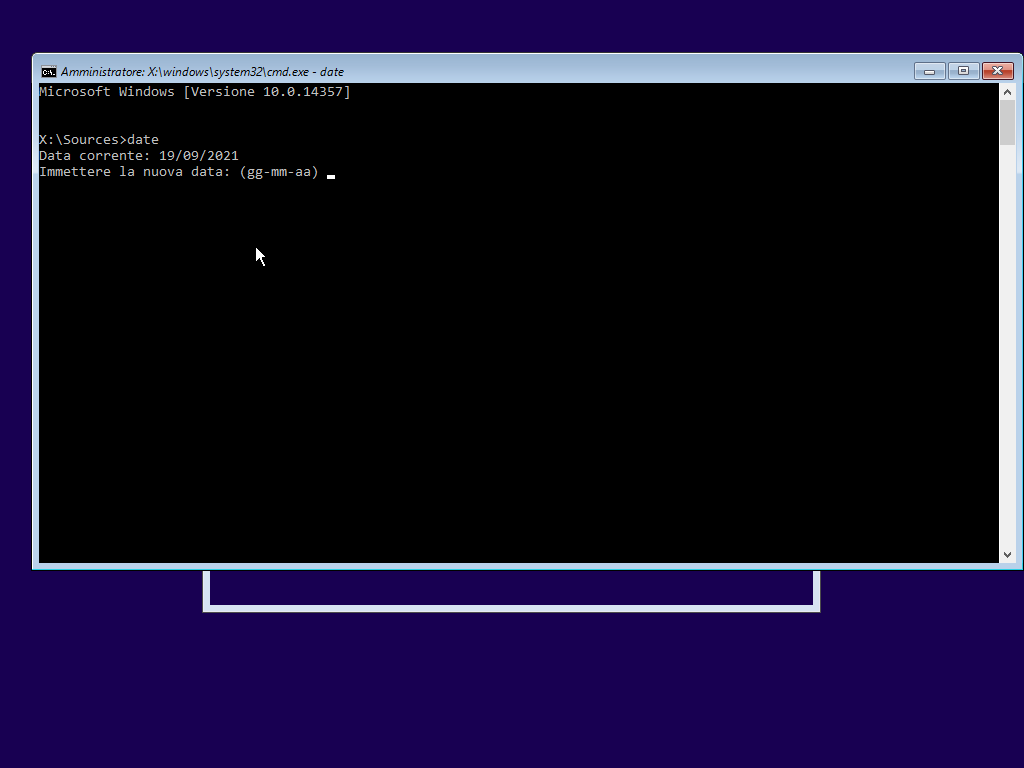
14357.1000 (UEFI)

9879 x64 (UEFI)
- (Betajyst4094 或 Mintel)解除时间炸弹的 ISO: https://drive.google.com/file/d/1C0Abnp6iah77Yh_5YbAbclDzepufgXBB/view?usp=sharing
9841 x64 (UEFI)
- (Betajyst4094 或 Mintel)解除时间炸弹的 ISO: https://drive.google.com/file/d/17P2zHsRHKCXTehmrTi5CLHBalecCQIOL/view?usp=sharing
9860 x64 (UEFI)
- (Betajyst4094 或 Mintel)解除时间炸弹的 ISO: https://drive.google.com/file/d/1d9hM94oSQwMC7obvnVW-6gl9YNztjsfr/view?usp=sharing
9888 x64 (UEFI & BIOS)
- (Betajyst4094 或 Mintel)解除时间炸弹的 ISO: https://mega.nz/file/fUwUxQiR#0qjyARvo-3k73x2Irh2Wn2f4gbeollxYtmVOEUWgCqc
感谢我同事的翻译,他友好而礼貌的留言:“thank you so much lucas for giving me this f___ing piece of s__t to translate, after translating this s__t I know more about f___ing win 10 than anyone on the f___ing net m_____f___er”
编辑:感谢 Zammis Clark 提出文中错误,现已修正。同时他还指出,“最好”的方法可能是fork EfiGuard 项目并用于修改 ci.dll 中的签名检查部分,这样就不需要使用拐弯抹角的方法处理文件。
桃花注:如果你看完这篇文章还想“拆弹”并日用过期的测试版,那本站可能不太适合你。
下页是英文原文 :
What Is “Flightsigning”
Flightsigning describes the process of digitally signing files with flight certificates. There are 4 common types of certificates used by Microsoft to sign Windows system files:
- Prod – PCA 2010
- PreProd – PCA 2011
- Flight – Development PCA 2014
- Test – a variety of things, most commonly MSIT Test CodeSign CA
Flight is just a particular certificate/series of certificates used by Microsoft, and when signed with a flight certificate, the build is called a flightsigned build.
Why “Flightsigned” Builds Cannot Boot on Current Date
The certificates used to sign early flightsigned builds explicitly specified expiration times, and were designed so that they become invalid as soon as the system time goes past the expiry time. This means Windows will treat system files digitally signed by those flight certificates as invalid once they expire.
This is a bit like how you cannot boot Windows normally with patched system files. A difference is, with signatures invalidated by modifications to the the binaries, you may use the NOINTEGRITYCHECKS BCD option to force the bootloader to continue booting, but with expired certificates, the bootloader will stop loading regardless.
This means the system time must not be more recent than the expiry time of those flight certificates, hence you cannot boot flightsigned builds on current date.
Why Am I Writing This Guide and Some Background
For the past 15 years of my life, I’ve been playing with betas of DOS-based and “classic” NT-based Windows. A week ago I suddenly decided to play with “modern” versions of Windows, because I know nothing about them. I believe debombing a Windows 10 beta build is a good way to start.
I picked the first official pre-release build of Windows 10 (build 9841) – what a mistake! I thought it might be the easiest build to debomb, and I ignored the fact that nobody even talked about debombing it. I then read that only fbl_partner_eeap builds may be debombed, because they contain “non-functional timebombs and as a result can be installed on the current date”. Well, I’d like to challenge the fact that only fbl_partner_eeap builds may be debombed, so I chose to continue with 9841 (a fbl_release flightsigned build).
Without a doubt, I overestimated my abilities and realized debombing a flightsigned build is like going through 9 circles of hell. Well, you see, I am talking about it so obviously I succeeded in the end. It was a long and tough battle, took me almost a week to fully defeat flightsigning.
Originally I patched the kernel to enable NOINTEGRITYCHECKS and then replaced all certificates in all digital signatures of all system files with a non-flight certificate taken from build 9838. Yep, it worked but the catalog files are also digitally signed with a flight certificate. I then went and replaced all catalogs with those from build 9838 – it didn’t work. Well, patches to ci.dll seems to be the only way left.
So in the end I patched ci.dll, then the Windows Loader (winload.exe/winload.efi) to load the patched ci.dll, and finally the Boot Manager to load the patched Windows Loader. It sounds easy but in reality it is much harder… well, not really that hard, just tedious. I patched 20 files just to safely get the x86 compile of Windows 10 build 9841 to boot on current date, and replacing all occurrences of those files in all indexes of boot.wim, install.wim and winre.wim took even more time. Since the process is so tedious, I am not going to patch every architecture of every flightsigned build, so I am just going to release a guide that will hopefully work for all flightsigned builds in all architectures.
Audience
This guide is for experienced readers only. To understand the procedures and perform the patches yourself, you must have a good understanding of the boot process of modern versions Microsoft Windows. You should also be able to understand C/C++ and the assembly language of the desired architecture.
If you do not have the ability to perform the patches yourself, I can patch them for you given that you upload the required files in the comments section below (since I am such a nice person). Currently I can only patch UEFI Boot Managers and Windows Loaders, because legacy BIOS ones are to time consuming to patch. You must upload ci.dll, winload.efi, winresume.efi, bootmgr.efi and bootmgfw.efi. Do not forget that the patches are only responsible for disabling the certificate expiry checks, you still need to ‘debomb’ the build by following this guide.
If you wish patch those files yourself, please go ahead and read the following sections.
Patching Windows to Boot on the Current Date
Since there are different architectures out there, and even for the same architecture, the patches may be different (different offsets, different registers), I will demonstrate the patches mainly with C/C++ pseudo-code.
CI.DLL
The first file to patch is ci.dll, the Code Integrity Library responsible for signature validations. We are not going to completely remove signature validation, we are just going to make it ignore expired certificates.
There is a status called STATUS_IMAGE_CERT_EXPIRED, and we don’t want that to be returned. So, we need to patch functions that may return STATUS_IMAGE_CERT_EXPIRED. Since different builds have different number of functions capable of returning STATUS_IMAGE_CERT_EXPIRED, and those functions are probably all different, you should just search for 0x0C0000605 in ci.dll. When you find something like mov ???, 0C0000605h, check what causes 0C0000605h to be moved to the ??? register. Generally you should find an if-statement like this:
if ( condition )
{
  // certificate expired
  result = STATUS_IMAGE_CERT_EXPIRED;
}
// certificate not expired
We need to remove the if-statement, preferably by patching a conditional jump to become an unconditional jump or by NOP-ping out a conditional jump (depending on the situation). Make sure you find all instances of mov ???, 0C0000605h and patch them all.
CipReportAndReprieveUMCIFailure should also be patched just to be safe, since we are modifying system files. In there we need to make the code inside the if-statement (g_CiDeveloperMode & 1) != 0 execute regardless of the value of g_CiDeveloperMode.
if ( (g_CiDeveloperMode & 1) != 0 )
{
  // code here
  EventDescriptor = (const EVENT_DESCRIPTOR *)CiPolicyFailureIgnored;
  *(BYTE *)a10 = 1;
  // code here
}
You should find a conditional jump after the TEST instruction. Again, depending the the situation, you need to either make that unconditional or you NOP it out.
Extra Steps Without Symbols
For the g_CiDeveloperMode patch, you need to identify the CipReportAndReprieveUMCIFailure function first. To identify that function, search for the ASCII string “This break indicates this binary is not signed correctly” and jump to reference. Scroll up until you find a call to PsGetProcessProtection, and not far above that you should see a TEST instruction (test something, 10h). Once you find that, you should see another TEST instruction (test something, 1) above that one, and that TEST instruction is the (g_CiDeveloperMode & 1) != 0 if-statement. Now you patch the conditional jump right below it as you would with debug symbols.
BOOTMGR/BOOTMGR.EFI, MEMTEST.EXE/MEMTEST.EFI, CDBOOT.EFI
Since we patched ci.dll, we must patch the Windows Loader to load our patched ci.dll. There are two things to patch – the signature validity check (what causes the blue screen saying Windows cannot load xxx), and the boot option check (to prevent that Preparing Automatic Repair screen).
For the signature validity check, we need to remove the checks for the return value of the ImgpValidateImageHash function. You may also patch ImgpValidateImageHash itself to return zero, but I recommend that you patch the return value checks (patching a complex function to just return 0 may cause undesired effects). Locate the ImgpValidateImageHash function first, jump to reference, you should see the return value being moved to another register, and then a TEST instruction. You should patch the conditional jump under the TEST instruction to become an unconditional jump if it jumps outside of the if-statement, to avoid executing code inside the if-statement. If it jumps to the code inside that if-statement, then you should NOP the conditional jump out. What the code may look like:
result = ImgpValidateImageHash(something);
if ( result < 0 )
{
  result = ImgpFilterValidationFailure(something);
  if ( result < 0 )
  {
    if ( (something & 0x20) != 0 )
      goto Label;
    result = 0;
  }
}
Then you should patch BlImgQueryCodeIntegrityBootOptions to tell the Windows Loader to ignore ‘corrupted’ files, to avoid that “Preparing Automatic Repair” screen every time you boot Windows. You just need to make the second argument (IntegrityChecksDisabled, a PBOOLEAN) TRUE.
Extra Steps Without Symbols
To find the ImgpValidateImageHash function, search for the ASCII string "1.3.6.1.4.1.311.61.4.1", then jump to reference. To find the BlImgQueryCodeIntegrityBootOptions function, search for 0x16000048 until you see 0x16000049 not far below it, then continue to search for 0x16000048 until you see 0x16000049 below it again.
BOOTMGR/BOOTMGR.EFI, MEMTEST.EXE/MEMTEST.EFI, CDBOOT.EFI
The Boot Manager also must be patched in order to load the patched Windows Loader. The patch is identical to the Windows Loader patch, except you don’t need to patch BlImgQueryCodeIntegrityBootOptions. The hardest part is modifying the compressed bootmgr file for legacy BIOS booting. If you are using UEFI, then you’re all done once you finish patching those Boot Manager .EFI files.
To patch the compressed bootmgr file, you first need to understand its structure. It can be broken into 4 parts – a raw 16-bit stub loader, a custom structure containing information about the compressed part, a stub PE file, and finally the compressed Boot Manager.
First step is to decompress it or find an uncompressed copy. You should be able to find a file called bootmgr.exe in boot.wim (WinPE), that file is identical to the Boot Manager file in bootmgr, except for not being compressed. You then need to follow the Boot Manager patch instructions above to patch it. Finally, you have to compress the patched executable and add it back to bootmgr. For compression, you may use joakim’s BOOTMGR Recompiler v2. It outputs a combined bootmgr with a hard coded 16-bit stub, so I strongly recommend that you extract the compressed part from the output file and replace the compressed part of the original bootmgr file with it. Of course you must also modify the custom structure below the 16-bit stub and the PE checksum of the PE stub. The custom structure is documented by jaokim so see the BOOTMGR Recompiler v2 project page for that. The PE checksum correction is a bit hard, so I decompiled some bootmgr signature checking functions and put together this. Just run it to print out the correct checksum, then change the PE checksum of the PE stub to the correct checksum.
Removing the Timebomb
Surprisingly… perhaps not, the wall of text above isn’t even related to debombing. If you patched all files correctly, you should now be able to boot Windows on the current date, but the timebomb is still there. Just like other pre-release builds of Windows 10, flightsigned builds can be debombed by following this BetaArchive guide. That guide is a bit confusing, so when I get time I will write a better one for BetaWorld.
Some Debombed Builds and Patched Files
9841 x86 (UEFI & BIOS)
9926 x64 (UEFI)
- Patched files: https://mega.nz/file/8lAixB6J#LH9NjQMzsCjDvcFemqums8SqZ3jooe4V5ldsVC3n6Lg
- Debombed ISO (by Mintel): https://drive.google.com/file/d/1Db4hvR8aNgOOxpWDAlG9rssrlvn6BE7r/view?usp=sharing
14357.1000 (UEFI)
- Patched WinPE ISO: https://mega.nz/file/5spGBRBJ#IpRs2ecvPV1SAYBEaRh62o5ZgG9xaXzAaV2KOFnoEcM
9879 x64 (UEFI)
- Debombed ISO (by Betajyst4094 or Mintel): https://drive.google.com/file/d/1C0Abnp6iah77Yh_5YbAbclDzepufgXBB/view?usp=sharing
9841 x64 (UEFI)
- Debombed ISO (by Betajyst4094 or Mintel): https://drive.google.com/file/d/17P2zHsRHKCXTehmrTi5CLHBalecCQIOL/view?usp=sharing
9860 x64 (UEFI)
- Debombed ISO (by Betajyst4094 or Mintel): https://drive.google.com/file/d/1d9hM94oSQwMC7obvnVW-6gl9YNztjsfr/view?usp=sharing
9888 x64 (UEFI & BIOS)
- Debombed ISO (by Betajyst4094 or Mintel): https://mega.nz/file/fUwUxQiR#0qjyARvo-3k73x2Irh2Wn2f4gbeollxYtmVOEUWgCqc
Edit: Thanks to Zammis Clark for identifying errors in this article, they are now corrected. It is also suggested that the “best way” would probably be to fork EfiGuard to also patch the certificate expiry check in ci.dll, so that there will be no need to modify system files.